Create and Publish a Custom React Hook as an NPM Package
As React developers, we often come across scenarios where we want to reuse specific logic across multiple components. React hooks make this easy, but what if you want to share your hooks with the wider community? Publishing your custom hooks as NPM packages allows you to contribute to the open-source community while making your work reusable across different projects.
In this blog, I’ll guide you through the process of creating a custom hook and publishing it as an NPM package step-by-step. We will cover:
- Creating a custom hook in React.
- Setting up the project with Babel.
- Publishing the hook to NPM.
By the end of this tutorial, you will have your own React hook published on NPM, ready for the world to use.
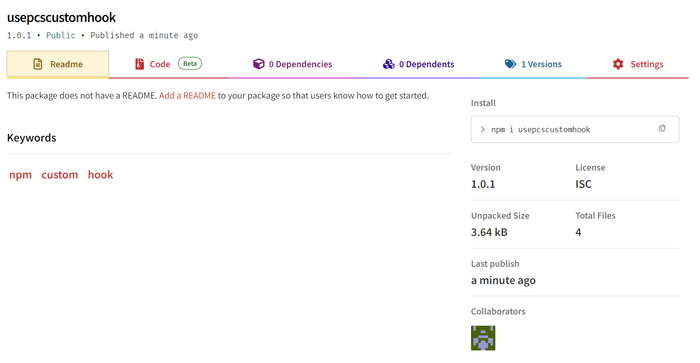
It looked something like this:
Step 1: Creating a Custom React Hook
First, let's create a simple React hook that tracks the browser window size. This can be useful for responsive layouts.
Hook Code: useWindowSize
import { useState, useEffect } from 'react';

export function useWindowSize() {
  const [windowSize, setWindowSize] = useState({
    width: window.innerWidth,
    height: window.innerHeight
  });

  useEffect(() => {
    function handleResize() {
      setWindowSize({
        width: window.innerWidth,
        height: window.innerHeight
      });
    }

    window.addEventListener('resize', handleResize);
    handleResize();

    return () => window.removeEventListener('resize', handleResize);
  }, []);

  return windowSize;
}
This hook listens to the resize event and updates the width and height whenever the window size changes.
Step 2: Setting Up the Project
To publish our hook as an NPM package, we need to set up a project and configure it to build our code. We will use Babel for transpiling our code into a format that can be consumed by projects using different versions of React.
1. Initialize the Project
Run the following command to create a new NPM project:
npm initFill in the details like name, version, and description. Here’s an example of a package.json:
{
  "name": "usepcscustomhook",
  "version": "1.0.0",
  "description": "A custom hook for window size tracking",
  "main": "dist/useCustomHook.js",
  "scripts": {
    "build": "babel src --out-dir dist",
    "test": "echo \"Error: no test specified\" && exit 1"
  },
  "keywords": ["npm", "custom", "hook"],
  "author": "Praful Chauhan",
  "license": "MIT",
  "devDependencies": {
    "@babel/cli": "^7.25.7",
    "@babel/core": "^7.25.8",
    "@babel/preset-env": "^7.25.8",
    "@babel/preset-react": "^7.25.7"
  },
  "peerDependencies": {
    "react": "^18.0.0",
    "react-dom": "^18.0.0"
  }
}
2. Install Babel and React
Now, install the necessary development dependencies:
npm install --save-dev @babel/cli @babel/core @babel/preset-env @babel/preset-reactAdd a .babelrc configuration file to the root of your project to tell Babel how to transpile your code:
{
  "presets": ["@babel/preset-env", "@babel/preset-react"]
}
3. Organize Your Files
In the root of your project, create the following structure:
/src
  - useWindowSize.js
/dist (This will be generated after the build)
/index.js
The index.js should look like this:
export { useWindowSize } from './src/useWindowSize';Step 3: Build the Hook
To compile your hook using Babel, run:
npm run buildThis command will transpile the source files in src/ to the dist/ folder, making them ready for publication.
Step 4: Publish as an NPM Package
Now that your hook is ready, you can publish it to NPM.
1. Login to NPM
Make sure you have an NPM account. If you don’t have one, create an account on NPM.
Then, log in via the command line:
npm loginYou will be prompted for your username, password, and email.
2. Set the Package Version
Make sure your package.json version is set appropriately (e.g., 1.0.0). Every time you publish a new version, you need to increment the version number.
3. Publish the Package
Run the following command to publish your package:
npm publish --access publicYour hook will now be available on NPM, and you can install it in any project by running:
npm install usepcscustomhookStep 5: Adding Documentation
It’s important to provide clear instructions for using your hook. Here’s an example README.md for our useWindowSize hook:
README.md Example
# usepcscustomhook

A custom React hook for tracking window size.

## Installation

```bash
npm install usepcscustomhook
Usage
import React from 'react';
import { useWindowSize } from 'usepcscustomhook';

const MyComponent = () => {
  const { width, height } = useWindowSize();

  return (
    <div>
      <h1>Window Size</h1>
      <p>Width: {width}px</p>
      <p>Height: {height}px</p>
    </div>
  );
};

export default MyComponent;
License
MITConclusion
In this blog, we walked through the process of creating and publishing a custom React hook as an NPM package. This is a great way to make your reusable code available to the broader developer community.
Now, go ahead and create your own custom hooks, and don't hesitate to share them with the world via NPM!
Praful's Newsletter 🚀
Join 3900+ Engineers to Level Up Your Skills!
Subscribe to my Software Engineering Deep Dive Series covering ReactJS, Redux, ASP.NET Core, and Clean Architecture. Get 1 insightful email each week to enhance your development journey.

