Skip to Content

Blogs

ASP.NET Core10 min read - Sep 30, 2024

Deep Dive into Minimal APIs in ASP.NET Core 8

#ASP.NET Core#.Net 8 Core#Microservice#Minimal API

What is a Minimal API?

Minimal APIs were introduced in ASP.NET Core 6 and have been further enhanced in ASP.NET Core 8. Unlike traditional MVC-based APIs, Minimal APIs provide a lightweight and simplified approach for building HTTP services. They aim to reduce boilerplate code, allowing developers to create RESTful services using a more functional programming style.

In a Minimal API, you directly define routes and handle requests within the Program.cs file, without the need for controllers, attributes, or extensive configuration. This approach is ideal for microservices, serverless functions, and small services where you need quick, straightforward implementations.

Key Features of Minimal APIs in ASP.NET Core 8

  1. Minimal Configuration: No need for controllers, attributes, or dependency-heavy configurations.
  2. Route Handling Simplified: You define HTTP methods (GET, POST, PUT, DELETE, etc.) with Lambda expressions.
  3. Automatic Model Binding: Minimal APIs provide built-in support for binding request data to method parameters.
  4. Endpoint Filters: A powerful new feature in ASP.NET Core 8 for processing requests or responses globally or at specific endpoints.
  5. OpenAPI/Swagger Integration: Easily enable Swagger documentation even with minimal APIs.
  6. Dependency Injection (DI): Still supports all the powerful features of DI that ASP.NET Core offers.
  7. Lightweight and Fast: Since there’s less abstraction, Minimal APIs can be more performant, especially for small, focused tasks.

Why Choose Minimal APIs?

  • Faster Development: Minimal APIs reduce the need for extensive setup and configuration, speeding up the development process.
  • Lower Overhead: With less boilerplate code and fewer abstractions, Minimal APIs are lightweight and can perform better for small-scale services or microservices.
  • Flexible and Extensible: Minimal APIs still offer the flexibility of ASP.NET Core, including dependency injection, middleware, and integration with existing libraries.
  • Easier for Small Projects: Ideal for small, single-purpose APIs, microservices, or serverless applications that don't require the full MVC framework.

Setting Up a Minimal API in ASP.NET Core 8

Let's walk through a complete example of how to set up a Minimal API from scratch in ASP.NET Core 8.

Step 1: Create a New ASP.NET Core 8 Project

Start by creating a new ASP.NET Core 8 project using the command line.

dotnet new web -n MinimalApiExample
cd MinimalApiExample

This template generates a basic web project, which you can modify to implement a minimal API.

Step 2: Basic Setup of a Minimal API in Program.cs

In ASP.NET Core 8, you define endpoints directly in the Program.cs file. Here's an example:

var builder = WebApplication.CreateBuilder(args);
var app = builder.Build();

// A simple GET request
app.MapGet("/", () => "Welcome to Minimal API in ASP.NET Core 8");

// Start the application
app.Run();

In this basic setup:

  • MapGet: Defines a route for the HTTP GET request. When the root URL / is hit, it returns the message "Welcome to Minimal API in ASP.NET Core 8".

Step 3: Adding Multiple Routes and Parameterized Endpoints

You can add routes for different HTTP methods and include parameters in the routes to handle more complex operations.

var builder = WebApplication.CreateBuilder(args);
var app = builder.Build();

// GET method to fetch all users
app.MapGet("/users", () =>
{
    return new[] { "Alice", "Bob", "Charlie" };
});

// GET method with a parameter to fetch a user by ID
app.MapGet("/users/{id}", (int id) =>
{
    return $"User ID: {id}";
});

// POST method to create a new user
app.MapPost("/users", (User newUser) =>
{
    return Results.Created($"/users/{newUser.Id}", newUser);
});

// Start the application
app.Run();

// Define the User model
public record User(int Id, string Name, string Email);

Explanation:

  1. MapGet("/users"): Returns a list of users (for simplicity, just an array of strings).
  2. MapGet("/users/{id}"): Accepts a parameter id and returns the corresponding user ID.
  3. MapPost("/users"): Accepts a User object (model binding) and returns a "Created" response with a link to the newly created user.

Step 4: Adding Dependency Injection

You can still use all the ASP.NET Core features, such as Dependency Injection, with minimal APIs.

var builder = WebApplication.CreateBuilder(args);

// Add services to DI container
builder.Services.AddSingleton<IUserService, UserService>();

var app = builder.Build();

// GET method with DI
app.MapGet("/users", (IUserService userService) =>
{
    return userService.GetAllUsers();
});

// Start the application
app.Run();

// Service and Interface
public interface IUserService
{
    IEnumerable<string> GetAllUsers();
}

public class UserService : IUserService
{
    public IEnumerable<string> GetAllUsers()
    {
        return new[] { "Alice", "Bob", "Charlie" };
    }
}

Step 5: Adding Swagger for API Documentation

Even in Minimal APIs, you can easily integrate Swagger to generate API documentation.

Add the Swashbuckle.AspNetCore NuGet package for Swagger.

dotnet add package Swashbuckle.AspNetCore

Next, configure Swagger in Program.cs:

var builder = WebApplication.CreateBuilder(args);

// Add Swagger services
builder.Services.AddEndpointsApiExplorer();
builder.Services.AddSwaggerGen();

var app = builder.Build();

// Enable Swagger
app.UseSwagger();
app.UseSwaggerUI();

// Define minimal API routes
app.MapGet("/", () => "Hello, World!");

// Start the app
app.Run();

Now, when you run the application, Swagger documentation will be available at /swagger in the browser.

Step 6: Adding Authentication and Authorization

Minimal APIs also support authentication and authorization. Here’s a basic example using JWT authentication.

var builder = WebApplication.CreateBuilder(args);

// Add JWT authentication
builder.Services.AddAuthentication(JwtBearerDefaults.AuthenticationScheme)
    .AddJwtBearer(options =>
    {
        options.Authority = "https://your-auth-server";
        options.Audience = "your-api-audience";
    });

builder.Services.AddAuthorization();

var app = builder.Build();

app.UseAuthentication();
app.UseAuthorization();

// A protected API route
app.MapGet("/secure", () => "This is a protected resource")
    .RequireAuthorization();

app.Run();

In this example:

  • JWT authentication is added using AddJwtBearer.
  • The /secure route is protected by RequireAuthorization, ensuring that only authenticated users can access it.

Step 7: Leveraging Endpoint Filters (New in ASP.NET Core 8)

Endpoint filters in ASP.NET Core 8 allow you to define reusable logic that can be applied to multiple endpoints. This could include validation, logging, or modifying the request/response.

var builder = WebApplication.CreateBuilder(args);

var app = builder.Build();

// Define an endpoint filter
app.MapPost("/users", (User newUser) =>
{
    return Results.Created($"/users/{newUser.Id}", newUser);
}).AddEndpointFilter(async (context, next) =>
{
    var user = context.GetArgument<User>(0);
    
    if (string.IsNullOrEmpty(user.Name))
    {
        return Results.BadRequest("Name is required");
    }

    return await next(context);
});

app.Run();

// User model
public record User(int Id, string Name, string Email);

In this example:

  • We define an endpoint filter that ensures a user's name is not empty before proceeding with the request.

Conclusion

Minimal APIs in ASP.NET Core 8 provide a streamlined and efficient way to build small-scale web services. They reduce the overhead of traditional MVC patterns while still retaining the full power of ASP.NET Core's middleware, dependency injection, and other features. Whether you're building microservices, serverless functions, or just want a lightweight API for quick tasks, Minimal APIs offer a flexible and easy-to-use solution.

ASP.NET Core10 min read - Sep 30, 2024

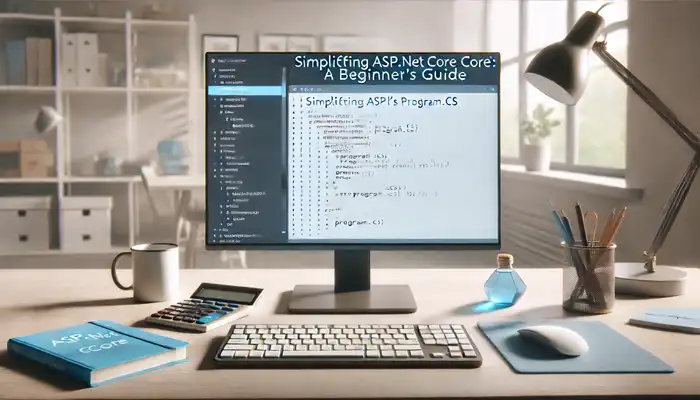
Simplifying ASP.NET Core s Program cs A Beginner s Guide

#ASP.NET Core#.Net 8 Core#Microservice

In the world of ASP.NET Core development, the Program.cs file is like the control center of your application. It's where you configure everything that your web app needs to run smoothly. Let's take a closer look at what Program.cs is and how you can use it to set up your ASP.NET Core application.

What is Program.cs?

Think of Program.cs as the starting point of your ASP.NET Core application. It's where you define how your app should be built and configured before it starts serving requests from users. Inside Program.cs, you'll find code that sets up things like services, database connections, API versioning, authentication, and more.

Configuring Services

One of the most important tasks in Program.cs is configuring the services that your app needs. These services could be anything from database access to logging utilities. Here's a simple example of how you can configure a service:

// Configuring Services
builder.Services.AddScoped<IAuthService, AuthService>();

Health Checks

Health checks are like routine check-ups for your application. They help you monitor the health of your app's components and dependencies. Here's how you can set up health checks in Program.cs:

// Health Checks
builder.Services.AddHealthChecks()
    .AddSqlServer(builder.Configuration.GetConnectionString("DefaultConnection"), tags: new[] { "database" });

CORS Policies

CORS (Cross-Origin Resource Sharing) policies control which external domains can access your API. You can configure CORS policies in Program.cs like this:

// CORS Policies
var myCorsPolicy = "MyCorsPolicy";
builder.Services.AddCors(options =>
{
    options.AddPolicy(myCorsPolicy, builder =>
    {
        builder.AllowAnyOrigin().WithExposedHeaders("x-my-custom-header");
    });
});

Database Connections

Connecting your ASP.NET Core app to a database is essential for storing and retrieving data. Here's how you can set up database connections in Program.cs:

// Database Connections
builder.Services.AddDbContext<MyDbContext>(options =>
    options.UseSqlServer(builder.Configuration.GetConnectionString("DefaultConnection")));
builder.Services.AddDbContext<AppDbContext>(options =>
{
    options.UseNpgsql(builder.Configuration.GetConnectionString("DefaultConnectionPS"));
});

API Versioning

API versioning allows you to manage changes to your API over time. You can configure API versioning in Program.cs like this:

// API Versioning
builder.Services.AddApiVersioning(o =>
{
    o.AssumeDefaultVersionWhenUnspecified = true;
    o.DefaultApiVersion = new ApiVersion(2, 0);
    o.ReportApiVersions = true;
});

Swagger for API Documentation

Swagger generates interactive API documentation for your ASP.NET Core app. Here's how you can set up Swagger in Program.cs:

// Swagger for API Documentation
builder.Services.AddSwaggerGen();

Harnessing the Power of MassTransit for Messaging

MassTransit is a powerful messaging library for .NET applications. You can configure MassTransit in Program.cs like this:

// MassTransit Setup
builder.Services.AddMassTransit(x =>
{
    x.UsingRabbitMq();
});
builder.Services.AddMassTransitHostedService();

Authentication and Authorization

Authentication and authorization control access to your app's resources. Here's how you can set up authentication and authorization in Program.cs:

// Authentication and Authorization
builder.Services.AddJwtAuthentication();
builder.AddAppAuthentication();
builder.Services.AddAuthorization();

Configuring Logging

Logging helps you keep track of what's happening in your application. Configure logging in Program.cs like this:

// Configuring Logging
builder.Host.ConfigureLogging(logging =>
{
    logging.ClearProviders();
    logging.AddConsole();
});
var logger = new LoggerConfiguration()
    .ReadFrom.Configuration(builder.Configuration)
    .Enrich.FromLogContext()
    .CreateLogger();
builder.Logging.ClearProviders();
builder.Logging.AddSerilog(logger);

Enlisting Hosted Services for Background Tasks

Hosted services allow you to run background tasks in your ASP.NET Core app. You can enlist hosted services in Program.cs like this:

// Enlisting Hosted Services for Background Tasks
builder.Services.AddHostedService<MyBackgroundService>();
builder.Services.AddHostedService<CartCleanupService>();

API Key Validation in ASP.NET Core's Program.cs

API key validation helps you control access to your API endpoints. You can set up API key validation in Program.cs like this:

// API Key Validation
app.UseMiddleware<ApiKeyMiddleware>();

AutoMapper Configuration

AutoMapper simplifies object-to-object mapping in your ASP.NET Core app. Configure AutoMapper in Program.cs like this:

// AutoMapper Configuration
IMapper mapper = MappingConfig.RegisterMaps().CreateMapper();
builder.Services.AddSingleton(mapper);

public static MapperConfiguration RegisterMaps()
{
	var mappingConfig = new MapperConfiguration(config =>
	{
		config.CreateMap<LocationDto, Location>().ReverseMap();
	});
	return mappingConfig;
}

Ocelot Configuration

Ocelot is a library for building API gateways on ASP.NET Core. You can configure Ocelot in Program.cs like this:

// Ocelot Configuration
builder.Configuration.AddOcelotWithSwaggerSupport(options =>
{
    options.Folder = "OcelotConfiguration";
});
builder.Services.AddOcelot(builder.Configuration).AddAppConfiguration();
builder.Services.AddSwaggerForOcelot(builder.Configuration);

Rate Limiting

Rate limiting helps you control the rate of requests to your API endpoints. You can set up rate limiting in Program.cs like this:

// Rate Limiting

builder.Services.AddRateLimiter(options =>
{
    options.RejectionStatusCode = StatusCodes.Status429TooManyRequests;
    options.addfixedwindowlimiter("fixed", options =>
    {
        options.permitlimit = 100;
        options.window = timespan.fromseconds(60);
        options.queueprocessingorder = queueprocessingorder.oldestfirst;
        options.queuelimit = 5;
    });
    options.AddTokenBucketLimiter("token", options =>
    {
        options.TokenLimit = 100;
        options.QueueProcessingOrder = QueueProcessingOrder.OldestFirst;
        options.QueueLimit = 5;
        options.ReplenishmentPeriod = TimeSpan.FromSeconds(60);
        options.TokensPerPeriod = 20;
        options.AutoReplenishment = true;
    });
    options.AddPolicy("fixed-by-ip", httpContext =>
        RateLimitPartition.GetFixedWindowLimiter(
            httpContext.Request.Headers["X-Forwarded-For"].ToString(),
            factory: _ => new FixedWindowRateLimiterOptions
            {
                PermitLimit = 10,
                Window = TimeSpan.FromMinutes(1)
            }
        )
    );
    options.AddConcurrencyLimiter("concurrency", options =>
    {
        options.PermitLimit = 10;
        options.QueueProcessingOrder = QueueProcessingOrder.OldestFirst;
        options.QueueLimit = 5;
    });
});

Conclusion

The Program.cs file in ASP.NET Core 8 is the heart of your application’s configuration. From setting up databases to API versioning, authentication, messaging, and more, this file defines how your app behaves and scales. With real-world examples, you can see how each of these features applies to building a robust application, like an e-commerce site. Mastering the configurations in Program.cs will help you build more efficient, scalable, and secure applications in ASP.NET Core.
ASP.NET Core8 min read - Sep 29, 2024

Secure Your API By IP Whitelisting Using ASP.NET Core 8 Web API

#ASP.NET Core#.Net 8 Core#Microservice#Secure API

In today’s digital landscape, securing APIs is a top priority, especially when exposing services over the internet. One way to increase security is through IP whitelisting — a technique that restricts access to only a specified set of IP addresses, effectively blocking traffic from unauthorized sources. This can be a crucial component in applications where access must be tightly controlled, like in financial services, internal APIs, or administrative dashboards.

In this blog, we’ll dive deep into how to implement IP whitelisting in an ASP.NET Core 8 Web API using a custom middleware.

What is IP Whitelisting?

IP Whitelisting is the process of allowing access to a web service only from pre-approved IP addresses. This ensures that even if someone has the correct credentials, they cannot access the API unless they’re using an approved IP address.

In an ASP.NET Core Web API, this functionality can be implemented via middleware that intercepts incoming requests, checks the origin’s IP, and determines whether to grant or deny access based on the whitelist.


Setting up IP Whitelisting in ASP.NET Core 8

Step 1: Creating the Middleware

Middleware is perfect for this task since it can inspect each HTTP request as it arrives. The following code shows how to create a custom IPWhitelistMiddleware that checks the client’s IP address against a predefined whitelist in the configuration:

using System.Net;

namespace BEArgentina.Services.AuthAPI.Middlewares
{
    public class IPWhitelistMiddleware
    {
        private readonly RequestDelegate _next;
        private readonly IConfiguration _configuration;

        public IPWhitelistMiddleware(RequestDelegate next, IConfiguration configuration)
        {
            _next = next;
            _configuration = configuration;
        }

        public async Task InvokeAsync(HttpContext context)
        {
            // Get the remote IP address of the client
            var remoteIp = context.Connection.RemoteIpAddress;

            // Fetch the allowed IPs from configuration
            var allowedIPs = _configuration.GetSection("AllowedIPs").Get<string[]>();

            // Check if the remote IP is in the allowed IP list
            if (!IPAddress.IsLoopback(remoteIp) && !allowedIPs.Contains(remoteIp?.ToString()))
            {
                // If the IP is not allowed, return a forbidden response
                context.Response.StatusCode = (int)HttpStatusCode.Forbidden;
                await context.Response.WriteAsync($"Access denied from IP: {remoteIp}");
                return;
            }

            // Proceed to the next middleware in the pipeline if the IP is allowed
            await _next(context);
        }
    }
}

Step 2: Registering Middleware in Program.cs

Now that the middleware is created, we need to register it in the request pipeline. Open your Program.cs file and add the IPWhitelistMiddleware to the pipeline using app.UseMiddleware.

Here’s how to do that:

var builder = WebApplication.CreateBuilder(args);

// Add services to the container.
builder.Services.AddControllers();

// Configure IP whitelist middleware
var app = builder.Build();

// Adding IP Whitelisting Middleware
app.UseMiddleware<BEArgentina.Services.AuthAPI.Middlewares.IPWhitelistMiddleware>();

// Configure the HTTP request pipeline.
app.MapControllers();

app.Run();

Step 3: Configuring Allowed IPs in appsettings.json

We’ll store the list of allowed IP addresses in the appsettings.json file. This makes it easy to configure and update the whitelist without touching the application’s codebase.

Add the following section to your appsettings.json:

{
  "AllowedIPs": [
    "192.168.1.100",
    "203.0.113.42",
    "203.0.113.50"
  ]
}

In this example, the application will only allow requests originating from the IP addresses 192.168.1.100, 203.0.113.42, and 203.0.113.50.

Step 4: Testing the Middleware

Now that you’ve set up the middleware and configured the allowed IPs, you can test the functionality by sending requests from an unauthorized IP. The middleware should respond with:

Access denied from IP: {client IP}

If the IP address is allowed, the request will proceed as usual.

Enhancing IP Whitelisting

You can enhance the basic implementation of IP whitelisting in several ways, such as:

  1. Environment-Specific IP Whitelists: You may want different whitelists for different environments (development, staging, production). This can be handled by creating environment-specific configuration files (appsettings.Development.json, appsettings.Production.json).

  2. CIDR Support: Instead of only allowing individual IP addresses, you could allow entire IP ranges using CIDR notation. This would require checking if the client’s IP falls within the allowed range.

  3. Dynamic IP Whitelisting: You could build a more dynamic system by fetching the allowed IPs from a database or a remote API, allowing administrators to update the whitelist without restarting the application.

Real-World Use Cases

IP whitelisting can be useful in various scenarios:

  1. Internal APIs: APIs that are only intended for internal use, such as those used by company applications or within corporate networks.

  2. Administrative Panels: Admin panels or dashboards that should only be accessible from within the office network or through a VPN.

  3. Compliance Requirements: Some industries, such as finance or healthcare, have strict compliance requirements that mandate restricting access based on IP address.

  4. External Service Access: APIs that allow access to external services but want to limit access to specific trusted partners or clients.

Conclusion

Implementing IP whitelisting in an ASP.NET Core 8 Web API adds an additional layer of security to your application. By controlling which IP addresses can access your API, you mitigate the risk of unauthorized access, especially to sensitive or administrative endpoints.

This simple yet effective technique can be easily set up using middleware in ASP.NET Core. You can also customize and enhance the whitelist logic as needed to fit more complex scenarios or requirements.

By implementing this security measure, your APIs are much more robust and ready to handle real-world security challenges.

Payment Gateway10 min read - Sep 27, 2024

Stripe Payment using .NET 8 Core Microservice and React JS

#Stripe#ASP.NET Core#.Net 8 Core#Microservice#React.js#React Hooks

In this blog, we will walk through the process of integrating Stripe payments into a .NET 8 Core Microservice architecture with a React JS front-end. This will cover both the backend API for processing payments and the React component for capturing customer details and initiating payments.

Prerequisites

  1. Stripe Account: Sign up for a Stripe account.
  2. Stripe API Keys: Get your publishable and secret keys from the Stripe Dashboard.
  3. .NET 8 SDK: Ensure you have the latest version of the .NET 8 SDK installed.
  4. React JS: Basic knowledge of React JS and how to set up a React application.

Setting Up the .NET 8 Core Microservice

1. Create a New .NET 8 API Project

dotnet new webapi -n StripePaymentService
cd StripePaymentService

2. Install Stripe SDK

Add the Stripe NuGet package to your project:

dotnet add package Stripe.net --version 42.0.0

3. Configure Stripe in appsettings.json

In the appsettings.json file, add your Stripe secret key.

{
  "Stripe": {
    "SecretKey": "your-stripe-secret-key",
    "PublishableKey": "your-stripe-publishable-key"
  }
}

4. Setup Stripe Service in .NET 8 Core

In the Program.cs file, configure Stripe services:

var builder = WebApplication.CreateBuilder(args);

// Add services to the container.
builder.Services.Configure<StripeSettings>(builder.Configuration.GetSection("Stripe"));

builder.Services.AddSingleton<IStripeClient, StripeClient>(sp =>
{
    var config = sp.GetRequiredService<IOptions<StripeSettings>>().Value;
    return new StripeClient(config.SecretKey);
});

builder.Services.AddControllers();

var app = builder.Build();

app.UseHttpsRedirection();
app.UseAuthorization();
app.MapControllers();
app.Run();

5. Create a Stripe Payment Controller

Create a new controller named PaymentController.cs to handle the payment request.

[ApiController]
[Route("api/[controller]")]
public class PaymentController : ControllerBase
{
    private readonly IStripeClient _stripeClient;

    public PaymentController(IStripeClient stripeClient)
    {
        _stripeClient = stripeClient;
    }

    [HttpPost("create-payment-intent")]
    public async Task<IActionResult> CreatePaymentIntent([FromBody] PaymentIntentRequest request)
    {
        var options = new PaymentIntentCreateOptions
        {
            Amount = request.Amount,
            Currency = request.Currency,
            PaymentMethodTypes = new List<string> { "card" }
        };

        var service = new PaymentIntentService(_stripeClient);
        var paymentIntent = await service.CreateAsync(options);

        return Ok(new { clientSecret = paymentIntent.ClientSecret });
    }
}

public class PaymentIntentRequest
{
    public long Amount { get; set; }
    public string Currency { get; set; }
}

6. Test the API

You can test the API using Postman or another API testing tool. Send a POST request to https://localhost:5001/api/payment/create-payment-intent with the following JSON payload:

{
    "amount": 2000,
    "currency": "usd"
}

If successful, it will return a clientSecret which you will use in the front-end to complete the payment.


React JS Frontend Integration

1. Install Stripe React and Stripe.js

In your React project, install the necessary Stripe packages:

npm install @stripe/react-stripe-js @stripe/stripe-js

2. Configure Stripe in React

Set up the StripeProvider and Elements in your App.js:

import React from 'react';
import { Elements } from '@stripe/react-stripe-js';
import { loadStripe } from '@stripe/stripe-js';
import PaymentForm from './PaymentForm';

const stripePromise = loadStripe('your-publishable-key');

function App() {
  return (
    <Elements stripe={stripePromise}>
      <PaymentForm />
    </Elements>
  );
}

export default App;

3. Create Payment Form Component

Create a new component PaymentForm.js that will handle the payment process:

import React, { useState } from 'react';
import { CardElement, useStripe, useElements } from '@stripe/react-stripe-js';

const PaymentForm = () => {
  const [amount, setAmount] = useState(2000); // Amount in cents
  const stripe = useStripe();
  const elements = useElements();

  const handleSubmit = async (event) => {
    event.preventDefault();
    const { error, paymentIntent } = await createPaymentIntent(amount);

    if (!error && stripe && elements) {
      const { error: stripeError } = await stripe.confirmCardPayment(paymentIntent.clientSecret, {
        payment_method: {
          card: elements.getElement(CardElement)
        }
      });

      if (stripeError) {
        console.error('Payment failed', stripeError);
      } else {
        console.log('Payment successful');
      }
    }
  };

  const createPaymentIntent = async (amount) => {
    const response = await fetch('https://localhost:5001/api/payment/create-payment-intent', {
      method: 'POST',
      headers: { 'Content-Type': 'application/json' },
      body: JSON.stringify({ amount, currency: 'usd' })
    });
    return await response.json();
  };

  return (
    <form onSubmit={handleSubmit}>
      <CardElement />
      <button type="submit" disabled={!stripe}>Pay</button>
    </form>
  );
};

export default PaymentForm;

4. Test the Frontend

Run your React application and test the payment flow by entering card details such as:

  • Card Number: 4242 4242 4242 4242
  • Expiration Date: Any future date
  • CVC: Any 3-digit number

If everything is configured correctly, you should see a successful payment response in your browser.


Conclusion

Integrating Stripe payments with a .NET 8 Core Microservice and React JS is a powerful way to handle secure transactions. The combination of .NET for backend processing and React for handling frontend interactions ensures a smooth and efficient payment experience.

This blog demonstrated setting up a microservice, processing payments with Stripe, and building a frontend interface for users. Happy coding!

Docker12 min read - Oct 18, 2024

Mastering NuGet Package Creation in .NET 8 Core: A Complete Guide to Building, Packaging, and Publishing

#.NET 8 Core#NuGet#IP Whitelisting#Web API

Creating a custom NuGet package is an excellent way to distribute reusable code across projects and share it with the .NET community. In this blog, we'll walk through the entire process of building and publishing a NuGet package in .NET 8 Core, using a practical example: an IP whitelisting middleware.

This step-by-step guide will help you understand how to package your .NET code and publish it on the official NuGet registry for others to use.

Table of Contents

  1. What is a NuGet Package?
  2. Prerequisites
  3. Step 1: Setting up Your .NET 8 Core Project
  4. Step 2: Writing the Middleware
  5. Step 3: Preparing the Project for Packaging
  6. Step 4: Adding a License
  7. Step 5: Creating the NuGet Package
  8. Step 6: Testing the NuGet Package
  9. Step 7: Publishing the NuGet Package
  10. Conclusion

1. What is a NuGet Package?

A NuGet package is essentially a compiled library that can be shared and reused across different projects. It contains assemblies, files, and metadata that describe the contents and dependencies. With NuGet, you can easily share reusable code or libraries with other developers.


2. Prerequisites

Before starting, make sure you have the following:

  • .NET 8 SDK installed. Download here
  • An IDE like Visual Studio or VS Code installed.
  • A NuGet.org account for publishing the package.
  • Basic knowledge of C# and .NET Core development.

3. Step 1: Setting up Your .NET 8 Core Project

The first step is to create a new project in .NET 8 Core.

Open your terminal and run the following commands:

dotnet new classlib -n IPWhitelist
cd IPWhitelist

This creates a new class library project named IPWhitelist.

Open the project in Visual Studio or your preferred IDE.


4. Step 2: Writing the Middleware

We'll now write the actual middleware that will whitelist certain IP addresses and block others.

Create a file named IPWhitelist.cs:

using Microsoft.AspNetCore.Http;
using Microsoft.Extensions.Configuration;
using System.Net;

namespace IPWhitelist
{
    public class IPWhitelist
    {
        private readonly RequestDelegate _next;
        private readonly IConfiguration _configuration;

        public IPWhitelist(RequestDelegate next, IConfiguration configuration)
        {
            _next = next;
            _configuration = configuration;
        }

        public async Task InvokeAsync(HttpContext context)
        {
            var remoteIp = context.Connection.RemoteIpAddress;
            var allowedIPs = _configuration.GetSection("AllowedIPs").Get<string[]>();

            if (!IPAddress.IsLoopback(remoteIp) && !allowedIPs.Contains(remoteIp?.ToString()))
            {
                context.Response.StatusCode = (int)HttpStatusCode.Forbidden;
                await context.Response.WriteAsync("Access denied for IP: " + remoteIp);
                return;
            }

            await _next(context);
        }
    }
}

This reads a list of allowed IP addresses from the configuration and blocks any requests coming from an IP not in the list.


5. Step 3: Preparing the Project for Packaging

Now we need to prepare the project for packaging. This involves updating the project file (.csproj) with important metadata like package name, version, description, and authors.

Open your .csproj file and modify it as follows:

<Project Sdk="Microsoft.NET.Sdk">

  <PropertyGroup>
    <TargetFramework>net8.0</TargetFramework>
    <PackageId>IPWhitelist</PackageId>
    <Version>1.0.0</Version>
    <Authors>Praful Chauhan</Authors>
    <Description>IP whitelisting in ASP.NET Core</Description>
    <PackageLicenseFile>LICENSE.txt</PackageLicenseFile>
    <PackageProjectUrl>https://github.com/cprafulm-gmail/IPWhitelist</PackageProjectUrl>
    <RepositoryUrl>https://github.com/cprafulm-gmail/IPWhitelist</RepositoryUrl>
  </PropertyGroup>

  <ItemGroup>
    <PackageReference Include="Microsoft.AspNetCore.Http" Version="8.0.0" />
    <PackageReference Include="Microsoft.Extensions.Configuration" Version="8.0.0" />
    <PackageReference Include="Microsoft.Extensions.Configuration.Binder" Version="8.0.0" />
  </ItemGroup>

</Project>

Here’s what each property means:

  • PackageId: The unique identifier for your package.
  • Version: The package version.
  • Authors: Your name or organization name.
  • Description: A brief description of the package.
  • PackageLicenseFile: The location of your license file.
  • PackageProjectUrl: The URL for your project or GitHub repository.
  • RepositoryUrl: The URL for your source repository.

6. Step 4: Adding a License

To include a license with your package, create a file called LICENSE.txt in the root of your project directory. Here’s an example of an MIT license:

MIT License

Copyright (c) 2024 Your Name

Permission is hereby granted, free of charge, to any person obtaining a copy of this software and associated documentation files (the "Software"), to deal in the Software without restriction, including without limitation the rights to use, copy, modify, merge, publish, distribute, sublicense, and/or sell copies of the Software, and to permit persons to whom the Software is furnished to do so, subject to the following conditions:
...

Make sure you add the path to this file in your .csproj file as demonstrated above.


7. Step 5: Creating the NuGet Package

With the code and metadata ready, it’s time to create the actual NuGet package.

Run the following command to package your project:

dotnet pack --configuration Release

This will generate a .nupkg file in the bin/Release folder. The package is now ready to be published.


8. Step 6: Testing the NuGet Package

Before publishing your package to NuGet.org, it's a good idea to test it locally.

You can install the NuGet package locally by using:

dotnet nuget add source "path/to/your/package/directory" -n LocalPackages
dotnet add package IPWhitelist --source LocalPackages

This allows you to verify the functionality of your package in a new project.


9. Step 7: Publishing the NuGet Package

Once you're satisfied with the package, you can publish it to NuGet.org.

Steps to Publish:

  1. Create a NuGet.org account: If you don’t have one already, go to NuGet.org and create an account.
  2. Get an API key: Go to your account settings on NuGet.org and generate an API key. You’ll need this to publish the package.
  3. Publish the package: Run the following command in your terminal:
dotnet nuget push bin/Release/IPWhitelist.1.0.0.nupkg -k <your-api-key> -s https://api.nuget.org/v3/index.json

Replace <your-api-key> with the API key you generated on NuGet.org.


10. Conclusion

In this blog, we walked through the process of creating, packaging, and publishing a NuGet package in .NET 8 Core. By following these steps, you can create your own reusable middleware or library, and share it with the world through NuGet.

Creating and publishing NuGet packages empowers developers to build reusable, modular code that others can benefit from. Whether it’s for internal use or for the community, the process is straightforward and allows you to contribute to the broader .NET ecosystem.

Happy coding!

React10 min read - Oct 16, 2024

Create and Publish a Custom React Hook as an NPM Package

#NPM#ReactJS#Package#Frontend

As React developers, we often come across scenarios where we want to reuse specific logic across multiple components. React hooks make this easy, but what if you want to share your hooks with the wider community? Publishing your custom hooks as NPM packages allows you to contribute to the open-source community while making your work reusable across different projects.

In this blog, I’ll guide you through the process of creating a custom hook and publishing it as an NPM package step-by-step. We will cover:

  • Creating a custom hook in React.
  • Setting up the project with Babel.
  • Publishing the hook to NPM.

By the end of this tutorial, you will have your own React hook published on NPM, ready for the world to use.

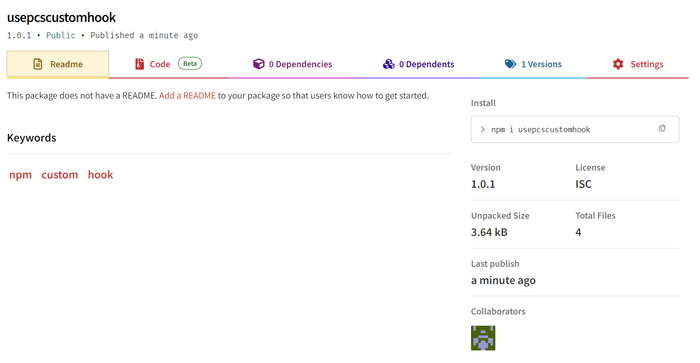
It looked something like this:

Installed NPM

Step 1: Creating a Custom React Hook

First, let's create a simple React hook that tracks the browser window size. This can be useful for responsive layouts.

Hook Code: useWindowSize

import { useState, useEffect } from 'react';

export function useWindowSize() {
  const [windowSize, setWindowSize] = useState({
    width: window.innerWidth,
    height: window.innerHeight
  });

  useEffect(() => {
    function handleResize() {
      setWindowSize({
        width: window.innerWidth,
        height: window.innerHeight
      });
    }

    window.addEventListener('resize', handleResize);
    handleResize();

    return () => window.removeEventListener('resize', handleResize);
  }, []);

  return windowSize;
}

This hook listens to the resize event and updates the width and height whenever the window size changes.

Step 2: Setting Up the Project

To publish our hook as an NPM package, we need to set up a project and configure it to build our code. We will use Babel for transpiling our code into a format that can be consumed by projects using different versions of React.

1. Initialize the Project

Run the following command to create a new NPM project:

npm init

Fill in the details like name, version, and description. Here’s an example of a package.json:

{
  "name": "usepcscustomhook",
  "version": "1.0.0",
  "description": "A custom hook for window size tracking",
  "main": "dist/useCustomHook.js",
  "scripts": {
    "build": "babel src --out-dir dist",
    "test": "echo \"Error: no test specified\" && exit 1"
  },
  "keywords": ["npm", "custom", "hook"],
  "author": "Praful Chauhan",
  "license": "MIT",
  "devDependencies": {
    "@babel/cli": "^7.25.7",
    "@babel/core": "^7.25.8",
    "@babel/preset-env": "^7.25.8",
    "@babel/preset-react": "^7.25.7"
  },
  "peerDependencies": {
    "react": "^18.0.0",
    "react-dom": "^18.0.0"
  }
}

2. Install Babel and React

Now, install the necessary development dependencies:

npm install --save-dev @babel/cli @babel/core @babel/preset-env @babel/preset-react

Add a .babelrc configuration file to the root of your project to tell Babel how to transpile your code:

{
  "presets": ["@babel/preset-env", "@babel/preset-react"]
}

3. Organize Your Files

In the root of your project, create the following structure:

/src
  - useWindowSize.js
/dist (This will be generated after the build)
/index.js

The index.js should look like this:

export { useWindowSize } from './src/useWindowSize';

Step 3: Build the Hook

To compile your hook using Babel, run:

npm run build

This command will transpile the source files in src/ to the dist/ folder, making them ready for publication.

Step 4: Publish as an NPM Package

Now that your hook is ready, you can publish it to NPM.

1. Login to NPM

Make sure you have an NPM account. If you don’t have one, create an account on NPM.

Then, log in via the command line:

npm login

You will be prompted for your username, password, and email.

2. Set the Package Version

Make sure your package.json version is set appropriately (e.g., 1.0.0). Every time you publish a new version, you need to increment the version number.

3. Publish the Package

Run the following command to publish your package:

npm publish --access public

Your hook will now be available on NPM, and you can install it in any project by running:

npm install usepcscustomhook

Step 5: Adding Documentation

It’s important to provide clear instructions for using your hook. Here’s an example README.md for our useWindowSize hook:

README.md Example

# usepcscustomhook

A custom React hook for tracking window size.

## Installation

```bash
npm install usepcscustomhook

Usage

import React from 'react';
import { useWindowSize } from 'usepcscustomhook';

const MyComponent = () => {
  const { width, height } = useWindowSize();

  return (
    <div>
      <h1>Window Size</h1>
      <p>Width: {width}px</p>
      <p>Height: {height}px</p>
    </div>
  );
};

export default MyComponent;

License

MIT

Conclusion

In this blog, we walked through the process of creating and publishing a custom React hook as an NPM package. This is a great way to make your reusable code available to the broader developer community.

Now, go ahead and create your own custom hooks, and don't hesitate to share them with the world via NPM!

Docker8 min read - Oct 02, 2024

ASP.NET Core 8 microservices in a single solution using Docker

#ASP.NET Core#.Net 8 Core#Microservice#Docker

To work with multiple ASP.NET Core 8 microservices in a single solution using Docker, you can create individual Dockerfiles for each service and orchestrate them using Docker Compose. Docker Compose allows you to define and manage multiple containers (microservices) in a single configuration file (docker-compose.yml), making it easier to run, scale, and manage multi-container applications.

Here’s a detailed step-by-step guide to containerizing multiple ASP.NET Core 8 microservices in a single solution.

Scenario Overview

Let’s assume you have two microservices in your solution:

  1. HotelService (ASP.NET Core 8 Web API for hotel-related operations)
  2. FlightService (ASP.NET Core 8 Web API for flight-related operations)

Each microservice will be built and run as its own container, but Docker Compose will orchestrate them.


Step 1: Create the Solution and Microservices

  1. Create a new solution:
dotnet new sln -n MicroservicesSolution
cd MicroservicesSolution
  1. Create the HotelService project:
dotnet new webapi -n HotelService
  1. Create the FlightService project:
dotnet new webapi -n FlightService
  1. Add the projects to the solution:
dotnet sln add HotelService/HotelService.csproj
dotnet sln add FlightService/FlightService.csproj

Step 2: Add Docker Support to Each Microservice

For each microservice, you’ll add a Dockerfile and .dockerignore file.

HotelService Dockerfile

Navigate to the HotelService folder and create a Dockerfile:

# Stage 1: Build the HotelService application
FROM mcr.microsoft.com/dotnet/sdk:8.0 AS build-env
WORKDIR /app

# Copy csproj and restore as distinct layers
COPY *.csproj ./
RUN dotnet restore

# Copy the rest of the application code
COPY . ./
RUN dotnet publish -c Release -o out

# Stage 2: Build the runtime image
FROM mcr.microsoft.com/dotnet/aspnet:8.0
WORKDIR /app
COPY --from=build-env /app/out .

EXPOSE 80
ENTRYPOINT ["dotnet", "HotelService.dll"]

Create a .dockerignore file in the HotelService folder:

bin/
obj/

FlightService Dockerfile

Navigate to the FlightService folder and create a Dockerfile:

# Stage 1: Build the FlightService application
FROM mcr.microsoft.com/dotnet/sdk:8.0 AS build-env
WORKDIR /app

# Copy csproj and restore as distinct layers
COPY *.csproj ./
RUN dotnet restore

# Copy the rest of the application code
COPY . ./
RUN dotnet publish -c Release -o out

# Stage 2: Build the runtime image
FROM mcr.microsoft.com/dotnet/aspnet:8.0
WORKDIR /app
COPY --from=build-env /app/out .

EXPOSE 80
ENTRYPOINT ["dotnet", "FlightService.dll"]

Create a .dockerignore file in the FlightService folder:

bin/
obj/

Step 3: Create the Docker Compose Configuration

At the root of your solution (where the .sln file is located), create a docker-compose.yml file. This file will define and configure both microservices.

version: '3.8'

services:
  hotelservice:
    build:
      context: ./HotelService
      dockerfile: Dockerfile
    ports:
      - "5001:80"
    networks:
      - microservices-network
    depends_on:
      - flightservice

  flightservice:
    build:
      context: ./FlightService
      dockerfile: Dockerfile
    ports:
      - "5002:80"
    networks:
      - microservices-network

networks:
  microservices-network:
    driver: bridge

Explanation:

  • services: Defines the two microservices (hotelservice and flightservice).
  • build: Specifies the context (project folder) and the Dockerfile for each service.
  • ports: Maps the container port (80) to the host machine’s port (5001 for hotelservice, 5002 for flightservice).
  • networks: Defines a shared network (microservices-network) to allow the services to communicate with each other.
  • depends_on: Ensures that hotelservice waits for flightservice to be ready.

Step 4: Build and Run the Microservices Using Docker Compose

  1. Navigate to the root directory of your solution (where the docker-compose.yml is located).

  2. Build the Docker images for both services:

docker-compose build
  1. Run both microservices:
docker-compose up

The docker-compose up command will start both microservices in separate containers, map the ports, and handle communication between them.


Step 5: Verify the Microservices

Once the services are up, you can test them by visiting the following URLs:

Both microservices should be running and accessible through their respective ports.


Step 6: Access Microservices via Internal Network

The two services are on the same Docker network (microservices-network). Therefore, you can communicate between services internally using their service names (hotelservice, flightservice).

For example, if HotelService needs to make a request to FlightService, it would use http://flightservice:80 internally, and similarly, FlightService can reach HotelService via http://hotelservice:80.


Step 7: Stopping and Cleaning Up

  1. Stop the containers:
docker-compose down

This will stop and remove the containers for both microservices.

  1. Remove unused images (optional):
docker image prune

This will remove unused Docker images and free up disk space.


Step 8: Push the Microservices Images to Docker Hub (Optional)

If you want to share or deploy the microservices using Docker Hub, follow these steps:

  1. Login to Docker Hub:
docker login
  1. Tag the images:
docker tag hotelservice your_dockerhub_username/hotelservice:latest
docker tag flightservice your_dockerhub_username/flightservice:latest
  1. Push the images to Docker Hub:
docker push your_dockerhub_username/hotelservice:latest
docker push your_dockerhub_username/flightservice:latest

Step 9: Deploy to Cloud (Optional)

You can deploy the Docker images to cloud platforms like Azure App Service for Containers, AWS ECS, or Google Cloud Run. For example, to deploy to Azure:

  1. Push the images to a container registry (Docker Hub, Azure Container Registry).
  2. Create an Azure App Service for Containers.
  3. Configure it to pull your images and deploy them.

Conclusion

By following these steps, you can containerize multiple ASP.NET Core 8 microservices in a single solution and use Docker Compose to manage them. Docker Compose simplifies the orchestration of multiple microservices, allowing you to run them simultaneously, set up networking between them, and manage dependencies.

This setup is highly scalable and can be extended to include databases, caching layers, message queues, etc., in the same docker-compose.yml file.

Frontend11 min read - Oct 02, 2024

Deep Dive into JavaScript ES6 Features

#JavaScript#ES6#Web Development#ReactJS

JavaScript ES6 (ECMAScript 2015) brought groundbreaking features that transformed the way we write and maintain code. These features not only made code more concise but also enhanced readability, scalability, and maintainability. Let's take a detailed dive into some of the most impactful ES6 features and understand their practical applications.


1. Arrow Functions

Explanation:

Arrow functions provide a more compact syntax for writing functions. They are particularly useful for short, anonymous functions, especially as callbacks. The key distinction is that arrow functions do not bind their own this context but inherit it from the surrounding scope, unlike traditional functions.

Usage:

  • Syntax: Arrow functions use => to separate the parameters from the function body.
  • No this Binding: Arrow functions do not have their own this. They capture this from the lexical context.

Example:

// Traditional function
function multiply(a, b) {
    return a * b;
}

// Arrow function equivalent
const multiply = (a, b) => a * b;

console.log(multiply(5, 3)); // Output: 15

// Arrow functions in callbacks
const numbers = [1, 2, 3];
const squares = numbers.map(num => num * num);
console.log(squares); // Output: [1, 4, 9]

Why It's Powerful:

  • Arrow functions simplify the syntax, making code cleaner and reducing boilerplate, especially in scenarios where this is critical (such as event handlers or promises).

2. Template Literals

Explanation:

Template literals introduce a new way to work with strings, making it easier to construct complex strings with embedded expressions. They utilize backticks (`) instead of single/double quotes, enabling multi-line strings and expression interpolation.

Usage:

  • Embedding Expressions: You can embed variables or expressions directly inside the string using ${}.
  • Multi-line Strings: Template literals allow for natural multi-line strings without the need for concatenation or newline characters.

Example:

const name = "John";
const age = 28;
const greeting = `Hello, my name is ${name} and I am ${age} years old.`;

console.log(greeting);
// Output: Hello, my name is John and I am 28 years old.

Why It's Powerful:

  • They make string construction more readable and concise, especially when working with dynamic content.

3. Destructuring Assignment

Explanation:

Destructuring assignment allows you to unpack values from arrays or properties from objects into distinct variables. This feature simplifies the extraction of values and properties, especially when dealing with nested objects or large datasets.

Usage:

  • Array Destructuring: Extract values from arrays into variables.
  • Object Destructuring: Extract properties from objects into variables, with the option to rename them.

Example:

// Array Destructuring
const coordinates = [10, 20];
const [x, y] = coordinates;
console.log(x, y); // Output: 10 20

// Object Destructuring
const person = { name: 'Alice', age: 32 };
const { name, age } = person;
console.log(name, age); // Output: Alice 32

// Destructuring with renaming
const { name: personName, age: personAge } = person;
console.log(personName, personAge); // Output: Alice 32

Why It's Powerful:

  • Destructuring simplifies the process of extracting data, making code cleaner and easier to maintain, especially in complex data structures.

4. Spread Operator (...)

Explanation:

The spread operator (...) allows iterable elements (like arrays or objects) to be expanded into individual elements. This is useful when creating copies of arrays/objects, combining arrays/objects, or passing arguments to functions.

Usage:

  • Array Manipulation: Spread operator is frequently used to merge arrays or create shallow copies.
  • Object Spread: Copy or merge object properties into a new object.

Example:

// Merging arrays
const arr1 = [1, 2, 3];
const arr2 = [4, 5, 6];
const combined = [...arr1, ...arr2];
console.log(combined); // Output: [1, 2, 3, 4, 5, 6]

// Copying objects
const obj1 = { a: 1, b: 2 };
const obj2 = { ...obj1, c: 3 };
console.log(obj2); // Output: { a: 1, b: 2, c: 3 }

Why It's Powerful:

  • The spread operator allows for easier manipulation of data structures (arrays and objects), reducing the need for complex methods like concat() or Object.assign().

5. Rest Parameter

Explanation:

The rest parameter syntax (...args) allows functions to accept an indefinite number of arguments as an array. It’s a more flexible way to work with multiple arguments without explicitly listing each one.

Usage:

  • Function Arguments: The rest parameter collects all remaining function arguments into an array.

Example:

function sum(...numbers) {
    return numbers.reduce((total, number) => total + number, 0);
}

console.log(sum(1, 2, 3)); // Output: 6
console.log(sum(10, 20, 30, 40)); // Output: 100

Why It's Powerful:

  • Rest parameters simplify the handling of multiple arguments, especially in functions where the number of arguments may vary.

6. Async/Await

Explanation:

async/await is a new way to work with asynchronous code in JavaScript, making it more readable and easier to follow than traditional promise chaining. By using async functions, you can pause code execution using await until a promise is resolved or rejected.

Usage:

  • Async Functions: Declare a function as async to enable await inside it.
  • Awaiting Promises: The await keyword pauses execution until the promise resolves.

Example:

async function fetchData() {
    try {
        const response = await fetch('https://api.example.com/data');
        const data = await response.json();
        console.log(data);
    } catch (error) {
        console.error('Error fetching data:', error);
    }
}

fetchData();

Why It's Powerful:

  • It greatly simplifies asynchronous workflows, allowing code to appear synchronous and making error handling cleaner with try/catch blocks.

7. Map & Set

Explanation:

ES6 introduces two new data structures: Map and Set. A Map is an ordered collection of key-value pairs, and a Set is a collection of unique values.

  • Map: Like an object, but allows keys of any type.
  • Set: Stores unique values of any type, preventing duplicates.

Example:

// Map Example
const map = new Map();
map.set('key1', 'value1');
map.set('key2', 'value2');
console.log(map.get('key1')); // Output: value1

// Set Example
const set = new Set([1, 2, 2, 3]);
console.log(set); // Output: Set { 1, 2, 3 }

Why It's Powerful:

  • Map provides better handling for non-string keys, and Set ensures data uniqueness, simplifying operations like finding duplicates.

8. Default Parameters

Explanation:

Default parameters allow you to set default values for function parameters if no argument is passed, reducing the need for checks like if or ||.

Usage:

  • Function Defaults: If no argument or undefined is passed, the default value is used.

Example:

function greet(name = 'Guest') {
    return `Hello, ${name}!`;
}

console.log(greet()); // Output: Hello, Guest!
console.log(greet('Alice')); // Output: Hello, Alice!

Why It's Powerful:

  • Default parameters simplify functions by reducing conditional checks for missing values, leading to cleaner, more reliable code.

9. Modules

Explanation:

ES6 modules provide a structured way to organize and share code across files, promoting better separation of concerns and reusability. By using import and export, you can share functions, objects, and variables across files.

Usage:

  • Export: Declare what should be shared from a module.
  • Import: Bring the exported functionality into another file.

Example:

// utils.js
export function add(a, b) {
    return a + b;
}

// main.js
import { add } from './utils.js';
console.log(add(2, 3)); // Output: 5

Why It's Powerful:

  • Modules encourage better code organization, making projects easier to maintain and scale, while avoiding global scope pollution.

10. Map Method

Explanation:

The map() method creates a new array by applying a function to each element of an existing array. It is commonly used to transform arrays.

Example:

const numbers = [1, 2, 3, 4];
const squares = numbers.map(num => num * num);
console.log(squares); // Output: [1, 4, 9, 16]

Why It's Powerful:

  • The map() method provides an elegant

way to transform data, making operations on arrays both concise and expressive.


11. Filter Method

Explanation:

The filter() method creates a new array with elements that pass a test defined by a function. It’s useful for filtering out unwanted data from arrays.

Example:

const numbers = [1, 2, 3, 4, 5];
const evenNumbers = numbers.filter(num => num % 2 === 0);
console.log(evenNumbers); // Output: [2, 4]

Why It's Powerful:

  • The filter() method provides a simple way to extract only the relevant elements from arrays, improving code readability.

12. Reduce Method

Explanation:

The reduce() method reduces an array to a single value by applying a function to each element and accumulating the result. It’s useful for summing up values or combining them in some way.

Example:

const numbers = [1, 2, 3, 4];
const sum = numbers.reduce((total, num) => total + num, 0);
console.log(sum); // Output: 10

Why It's Powerful:

  • The reduce() method provides an elegant way to condense arrays into a single value, making it ideal for aggregations and transformations.

Conclusion

ES6 revolutionized JavaScript, making it more modern, functional, and developer-friendly. Features like arrow functions, destructuring, template literals, and async/await have reshaped how developers write JavaScript, promoting cleaner, more maintainable code. By mastering these features, you can harness the full power of JavaScript to create efficient, readable, and scalable applications.

ASP.NET Core12 min read - Jun 29, 2024

Deep Dive into xUnit Testing in ASP.NET Core Web API

#Software Testing#Xunit#Web Api Development#Aspnetcore#Test Automation

In the realm of software development, ensuring the reliability, correctness, and maintainability of code is paramount. Automated testing plays a pivotal role in achieving these objectives, and among the plethora of testing frameworks available, xUnit stands out as a powerful and versatile tool. In this in-depth guide, we’ll embark on a journey to...

ASP.NET Core12 min read - Jun 29, 2024

Secure Web API by Key Authentication in ASP.NET Core

#Api Development#Asp.net#Web Api Development#Security Services#Authentication

When you’re dealing with Web APIs or REST APIs, it’s important to keep the endpoints secure. One common way to do this is by using something called API Keys. API Keys are special codes that serve as a kind of password for accessing these endpoints. They’re usually stored in files like appsettings.json or other storage places. In this article, we’ll...

Payment Gateway12 min read - Jun 29, 2023

Razorpay Payment Gateway Integration using ASP.NET Core Clean Architecture and React JS

#Razorpay#ASP.NET Core#Clean Architecture#React.js#React Hooks

In the digital age, online payment processing has become a vital component for businesses of all sizes. Integrating a reliable and secure payment gateway is crucial to provide a seamless experience for customers. One such popular payment gateway is Razorpay, known for its simplicity, robustness, and extensive features. In this blog, we will explore...

ASP.NET Core12 min read - Jun 29, 2022

Microservices Communication with Ocelot in ASP.NET Core Web API

#Microservices#Ocelots#Aspnet Core Web Api#Api Gateway#Routing

In a microservices architecture, managing communication between services can become complex. Each service may have its own endpoints and protocols, leading to challenges in routing and maintaining consistency. This is where Ocelot comes in — a middleware framework for ASP.NET Core that simplifies the process of building and maintaining APIs...

Praful's Newsletter 🚀

Join 3900+ Engineers to Level Up Your Skills!
Subscribe to my Software Engineering Deep Dive Series covering ReactJS, Redux, ASP.NET Core, and Clean Architecture. Get 1 insightful email each week to enhance your development journey.